Would anyone like to know more about…?

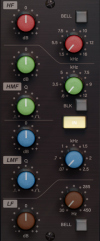
Not everyone prefers to use a plug-in with a graphical display, like the one I've shown above. There are a lot of plug-ins that emulate older, analogue consoles, like this.

Channel strip EQ.png

They can deliver great results. Once you understand the concepts 'Q' and 'sweep frequency', the on-screen rotaries should make perfect sense.
 
Last edited:
News Flash: If you want some drum to practice your mixing chops on, there's now a FREE version of BFD: Drum Software BFD Player

BFD uses multiple samples of drums, recorded on world-class studios. Because they use so many samples of each drum, they respond very realistically to how hard – and where on the head – you hit. I've got the full BFD3, but if I hadn't, I'd be on the free version like a shot!
 
Before we start putting reverb and other treatments on the snare, I suggest we introduce the other drums, starting with the kick (or bass drum, for us Europeans). The kick and snare are in many ways the heart of the drum kit, but the kick also presents us with a challenge: we must EQ it so that the kick and the bass guitar can easily be distinguished by the listener.

Let's get a rough mix of all the drums going before we worry too much about how it's going to work with the bass part (which could be synth BTW). If you have overhead mics working as a stereo pair, I suggest you pan them left and right, so that it gives you a realistic impression of how everything would sound if you were standing out front. How far L-R you pan is a judgement call, because there is normally a point where it's too wide and sounds unrealistic. Bear in mind that overhead mics pick up a lot more than just the cymbals and hi-hat, so how you set the stereo field for those two mics will directly impact on how you pan the spot mics to match the position of the toms etc.

It may be, however, that you're working with a drum machine, and have no overheads to act as the template for the position of your other drum mics. In either event, I suggest you pan each drum to match the physical position they would be in standing in front of the kit, perhaps in the first row of the audience. Generally speaking then, from the right side of the stereo image you'll have: hi-hat, snare drum and crash cymbal, hi tom, mid tom and kick drum, ride cymbal and floor tom on the left. (These are only approximate, but the running order is usually correct.)
 
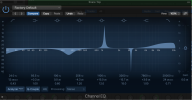
Here's a trick I learned when working Front of House in venues, and it's useful if you're dealing with multi-mic recordings of a real drummer. On each spot mic (iespecially on snare and individual toms) EQ out those parts of the audio spectrum not needed for that particular instrument. Let's take another look at the parametric EQ:

Parametric.png

See that symbol, top left, next to the little + sign? That's the bass roll-off. We can use it to progressively strip out low end, until what we're left with is what we want to hear - no more, no less. Why you do it is because all the tom and snare mics will be picking up stage rumble, the kick drum, the bass player's rig and a load of other stuff that isn't helping your mix at all. The reason it's especially important live is because all that unwanted energy eats up the headroom in your mixer, amp and speakers. If you want a loud, clean drum sound, you subtract the ranges you don't need!

How you do it is to solo each drum in turn, dial in a steep roll-off, then sweep it up the frequency range until it just starts to alter the tonal quality of the drum. Dial it back to a slightly lower frequency and you're done. Repeat until you've covered the entire kit and your done (which won't take long unless you're working with Terry Bozio…) The two mics I'd leave alone, unless I had a compelling reason to tweak them are the overheads, because a natural, clear sound from them sort-of sets the scene for the other mics.

It is also possible to increase the separation between drums by using noise gates. I don't want to get into that here, because I'm guessing a lot of you aren't working with a live drummer, and I don't want to bore you with stuff that doesn't apply to your situation.
 
If you've been following the above, what you've probably got is a set of drums that are working quite well together, but sound nothing like the dynamic, exciting finished result you're hoping I can help you create. Fear not. We'll get to that part later. (I'm assuming BTW that you're working on the drums in isolation. If you're trying to work on them while all the other parts are playing, you're really making life difficult for yourself. Mute and Solo are your new best friends!)

Before we make the drums sound exciting, I'd like to introduce the bass part and use some more EQ tricks to ensure we can hear bass and kick as separate parts.Beore I started doing this stuff for real, I had the rediculous idea that adding more bass to the low-end parts was what what EQ was for. No, no my friends. That way lies a wall of mud, and I've heard too many live acts ruined by a so-called engineer who hadn't worked that one out.
 
Last edited:
With the bass guitar (or low synth part) and kick drum soloed, it's time to see how they work together. This is going to be the foundation of your mix, so it's very important they work well together. Both should be panned dead centre so that both woofers in the speaker system are sharing the load. Low frequencies have long wavelengths, meaning you'll detect very little positional shift by panning left or right. Dead centre shares the load between the speakers.

Something that can really give the kick drum a distinctive 'tap' sound from the wooden beater is a mic close-up to the drum head. This is as opposed to sticking a mic somewhere futher back inside the drum shell, or outside it completely. At mix time, it's already a done deal, so if there isn't enough of that 'tap', we can dial some in by boosting the kick drum EQ somewhere in the region of 2.5kHz-4kHz. Only your ears can tell you the right frequency, and Q contour.

Additionally – or possibly instead – you could consider a soft contour to reduce the frequencies between maybe 600Hz and 2.5kHz. It might seem counter intuitive, but you might want to reduce some of the frequencies on the kick below 200-250Hz. Without knowing the drummer, the drum, the mic used, where it was placed, and the sound you want to hear, I have to leave all these decisions up to you.

Next, I'm going to introduce some compression to tighten things up.
 
Last edited:
The classic analogue recording consoles from manufacturers including SSL, Neve and Harrison had not just EQ on every channel, but also a dynamics section that typically included a compressor section and an adjustable noise gate. It made the 'channel strips' expensive to manufacture, but it's what engineers demanded. Being able to control the dynamics of every single channel is an important element to getting tight, controlled mixes.

The good news is that 'inside the box' – as people say when the only processing they are using is in the DAW – you can use the same plug-in over and over. So, if you want 32 channels with a compressor in every one, it costs the same as using the compressor on just one channel.

It took me a long time to lear how to use compressors effectively. If you compress too much, or use inappropriate settings, you can produce some very dull, flat mixes indeed.

Fortunately, a lot of the big-name compressor plug-ins come with presets, which have bwen created by experienced mix engineers. While I'm not saying for a moment you should stick to the presets as if they are guaranteed to be just right for your programme content, they are a very handy starting point. Not only do they get you in the right kind of zone almost instantly, they are also a great learning tool.By messing about with the controls, you'll soon get to hear when a very fast attact, or a high compression ratio, or whatever is going to give you the result you're seeking, and alsi when it won't!

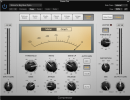
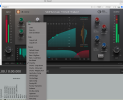
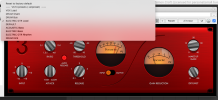
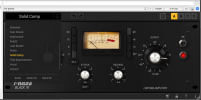
Below are compressors from SSL, Focusrite and IK Multimedia. If I had to choose just one as a starting point, I'd probably pick the Focusrite Red. It has a good range of features – so is versatile – but is fairly straightforward to operate, and is a sweet-sounding design with hardly a bad sound in there, no matter where you set the controls.

If you get yourself on the mailing list from one of the discount sellers – such as https://www.audiodeluxe.com – then wait patiently for the plug-ins you want to be on offer, you probably won't pay more than $30 for any of them. Not only that, if you Google 'audiodeluxe' you'll find web sites that let you download discount coupons to get additional price reductions.

That pretty much sums up why I use big-name plug-ins a lot of the time, rather than the ones that were bundled with the DAW. The exception – for me – is the ones that come with Logic Pro. They're generally very good… but that's a $199 DAW.
SSL.pngFocusrite.pngIK 76.png
 
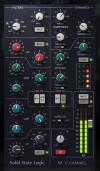
There is another approach, and that is to opt for one of the emulations of a complete analogue console channel strip. The one here is the Waves version of the SSL 4000E. It's got pretty much everthing from the original, with the exception of the Aux sends, as they're handled by your DAW. You've got a full EQ section with two parametric mid ranges, a compressor and an expander/gate, among features.

Interestingly, it's currently on sale for less than $30, which makes it very good value. That said, I'd still go for a dedicated compressor, if dynamic control was my main interest. The stand-alone units are just a bit more versatile, IMO.

SSL 4k Strip.png
 
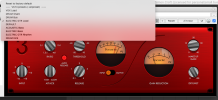
The layout of the Focusrite is reasonably typical of these units, so I'll use it to explain what the controls do.
Focusrite.png
The Input determines how much level goes through the remainder of the compressor circuits. While this was very important on the analogue original, if you've recorded your track at a sensible level, you'll probably leave the Input at zero.

Ratio is how much compression is applied compared to the uncompressed 1.5:1 is a very light compression, while infinity:1 essentially says 'no louder than this' past a certain level. The Threshold control determines at what level the compressor starts to act.

Attack and Release set how fast the compressor acts, and how fast it stops acting. These are probably the two controls you will spend the most time adjusting, but there's an Auto Release if you can't make your mind up,

The Make-up Gain control is useful for compensating for changes in level caused by the earlier compression setting, while the Input/Output switch allows you to get a visual check that the two levels match, using the meter above it. While 'gain staging' (ie managing levels within the mix circuits) is far less critical within a DAW than it is in an analogue signal chain, there is an important reason to match input and output level through the compressor if you can. At some point, you'll probably want to A/B your compressed/uncompressed signal to see if you're making things better or worse. If the A/B volume levels are different, your ear will tend to favour whichever is louder, making the comparison largely meaningless.

The Gain Reduction meter is useful because it shows how much the compressor is actually doing. When you first work with compression, it's easy to convince yourself "this isn't doing much" when it is. It takes a lot of experience before you can really hear light compression in action, which very often all you need.

Lastly, the Dry/Wet control allows you to set how much – if any – uncompressed signal is mixed in with the compressed. This can be a valuable tool for restoring some of the 'transient peaks' at the start of notes and drum strikes.
 
TIP: Don't be afraid to try presets, even if the name suggests their the wrong one for what you're trying to do. For instance, I had the Focusrite Red on a kick drum earlier and decided that the Electric Bass setting was a better starting point for me than 'DRUM kick'.
 
Thank you Simon new to recording using real drums found it's not the same as live on stage
they don't record the same way it could be room size my worst sounding live snare drum records the best
cuts through the mix for band practice was using a DW Collectors maple kit 12 14 16 20 BD toms recorded well the bass drum was lame
switched to my Ludwig kit 14 16 18 24 BD could not get rid of the overtones on the 14 tom switched to 13 that fixed it moving less air
learning my new Antelope audio interface real clean preamps and the plugins are good
end of the day can feel the drums through the monitors in the mix.
The Native Instruments ultimate collection drums they have sound lame and distorted compared to the real thing but their keyboard sounds are amassing
just using one overhead condenser mic for the cymbals
 

I am truly appreciative of this! Let me know if you want this “stickied” for the ages @simoncroft … please.

That would be great. Thank you!

t is! For our live sound this is invaluable!

This might just be your lucky day, my friend, for I have already written an extensive thread on Sound Reinforcement and another on Venue Acoustics, both of which are my copyright and could be included on this forum. I'd need to update them a bit. but they include a large numnber of diagrams I created explaining things like the different pick-up patterns of microphones, why the disopersion characteristic of a 4 x 12 cabinet is actually narrower than a single 12, how to mic a drum kit…

You'd be very welcome to all of it. (y) (y) (y)
 
I don't want to over-complicate things as this stage, so I'll state this again: if you're working with a drum machine – whether based on electronic or sampled acoustic drum sounds – or you're mixing a song using tracks supplied from a commercial studio, you don't have to beat yourself up compressing and EQing every individual drum. Why? Because someone else has already done the heavy lifting for you.

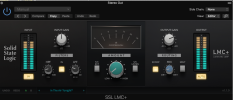
Here's a little test recording I did about a year ago to test the SSL LMC+ plugin I'd just bought. (I drop in the effects a little way in.)


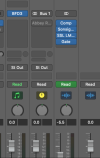
The signal chain was really simple. It looked like this:

Signal Chain.png
 
Let me break it down for you, step-by-step.

I've put all the processors on the stereo bus. Normally, I wouldn't do that, but because I'm only working with drums – and I want the processors to apply to all drums equally, there didn't seem any point in creating a dedicated effects bus/group/stack/folder… or whatever it's called on your preferred DAW.

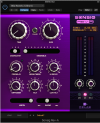
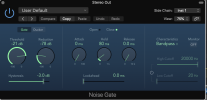
The full signal chain comprises: Logic Compressor; Relab Developments' Sonsig Rev-A; SSL LMC+, and finally, Logic Noise Gate. I introduce them to the traxck in sequence.

The compressor comes in at 4 sec 14. It makes the drum sound a bit 'bangier' and 'glued together', if that makes any sense. My settings looked like this:

Comp for LMC test.png
 
The next plig-in I introduced was the SSL LMC+, which is designed to emulate the sound of the Listen Mic on an SSL console. Producer/engineer Hugh Padham famously realised that the Listen Mic – which was only intended for enabling conversations between the Control Room and musicians on the Studio Floor – added a lot of the great acoustic from London's Townhouse Studios' Drum Room. The guy playing the drums was Phil Collins, so you guess which preset I chose.

SSL LMC.png
 
Back
Top