Would anyone like to know more about…?

I'm not sure I'd necessarily go along with that, Ben. In fact, I seem to remember on the sleeve notes of Katy Lied by Steely Dan, it specifically says that no EQ is used on the guitars. How are you recording your guitars? If you plug straight into an audio interface, it tends to rob the guitar of high end, making it rather lifeless, unless you put it through an amp sim. You're very welcome to post an example of your guitar recording without EQ, so I can hear what you're hearing.
 
Nice! I've just listened to your track on a pair of AKG K712 reference headphones – which a lot of mastering engineers use – and I'm not hearing anything wrong with your guitar sounds. The tuning on the 'riff' guitar is quite low, but that's helping to fill out the bass end of the mix. With no bass guitar (that I can hear), I'd probably want the kick a bit louder, but that's personal preference.
 
  • Like
Reactions: PLX
I have never eq'd or compressed my guitar recording. My time is spent before i go under the mic to get coming out the speaker exactly what i want.
Many years ago, I played bass on a recording session. (I'm not going to name the band or track, because it was released as a single.) On playback in the control room, the guitarist said of his part: "Hmmn, it doesn't sound very twangy." The engineer replied cooly: "Funnily enough, it didn't sound all that twangy when you played it."

Tony Clarke, who produced the Moody Blues among others, told me how he told off a junior engineer for reaching for the EQ without hardly listening to the guitarist. He told me: "I said, that's a very nice guitar, being recorded with an extremely high quality mic. On top of that, it's a nice day, so why spoil it?"

While I take your point, and the ones above, the situation changes somewhat when you're mixing a track you didn't record in the first place. Electric guitars that are a bit fizzy-sounding, and acoustic guitar parts that need to sit over an already busy mix, are two instances where EQ and compression are your friend. The trick is to get it to the point where it doesn't really sound like there's compression, but the internal dynmaics of the song, and the total output level of the mix, are under control.
 
Nice! I've just listened to your track on a pair of AKG K712 reference headphones – which a lot of mastering engineers use – and I'm not hearing anything wrong with your guitar sounds. The tuning on the 'riff' guitar is quite low, but that's helping to fill out the bass end of the mix. With no bass guitar (that I can hear), I'd probably want the kick a bit louder, but that's personal preference.
Yeah, the rhythm guitar is tuned to drop C#

There is bass, but I turned it way down in the mix on that track.
 
OK, here's a video about the SOTW snare drum. There's a lot to say about this one, partly because there are a lot of different techniques and issues going on, but also because how your snare sounds is a very important part of the overall mix.

One issue I'll flag up straight away: if you listen to the two mics on the snare (one on top, one below) you'll notice they sound quieter and have less low-end together, compare to individually. That's because they're out-of-phase. How so? It's because when the drummer strikes the top head of the snare, the top mic receives a momentary lowering in pressure as the head moves away from it, while the mic facing the head and snare underneath the drum receives an increase in pressure. Together, they cause partial cancellation.

As I'll prove in a later video, if we put one use the 180° phase reverse button on one of the two snare tracks, the sound is altogether different. I used a different approach on my mix, and introduced only a little of the under-snare, so that it was partially out-of-phase, which gave a slightly snappier sound.

I'll provide comments for the other techniques later.

 
For this mix I've set up a number of Aux mixes. Why? Because it makes much better use of your computer's power to have one instance of a plug-in, with two or more tracks fed to it, compared to using multiple instances across a number of tracks. Also, if you've established a reverb setting, for instance, that's going to be useful on all the vocal tracks, there's no point in repeating those settings on track-after-track.

How you set up Aux mixes in Reaper is pretty well documented, but if anyone wants a walk-through here, I'm happy to oblige.
 
For this mix I've set up a number of Aux mixes. Why? Because it makes much better use of your computer's power to have one instance of a plug-in, with two or more tracks fed to it, compared to using multiple instances across a number of tracks. Also, if you've established a reverb setting, for instance, that's going to be useful on all the vocal tracks, there's no point in repeating those settings on track-after-track.

How you set up Aux mixes in Reaper is pretty well documented, but if anyone wants a walk-through here, I'm happy to oblige.
I have used, and have a very basic understanding of bussing tracks into another track that has things like reverb, or harmonizer.. but I struggle with levels whenever I do this because I'm not sure which track(s) I'm supposed to be hearing.. the bus track, the tracks feeding the bus, both...

:unsure:
 
I have used, and have a very basic understanding of bussing tracks into another track that has things like reverb, or harmonizer.. but I struggle with levels whenever I do this because I'm not sure which track(s) I'm supposed to be hearing.. the bus track, the tracks feeding the bus, both...

:unsure:
Both.
 
I have used, and have a very basic understanding of bussing tracks into another track that has things like reverb, or harmonizer.. but I struggle with levels whenever I do this because I'm not sure which track(s) I'm supposed to be hearing.. the bus track, the tracks feeding the bus, both...

:unsure:
Here are a few pointers that I hope you will find helpful.
  • Try to be consistent with naming you buses and sends, using names that tell you instantly what they do: "slapback echo", "short reverb", long reverb" etc.
  • Once you have a bunch of buses and effects sends you find useful, turn the project file into a template, so you spend more time mixing and less on admin!
  • Instead of trying to mix everything at once, Solo a single drum track, and adjust your plug-ins (both within the track and on the buses) until you are satisfied.
  • Now take Solo off to see how that drum sounds against the rest of the drums. (In order to isolate the drums, you'll need to group them in a Folder, Stack, or Subgroup, with its own Solo button, otherwise you'll end up using multiple Mute or Solo buttons, which soon gets to be a real time consumer.)
  • Once you're in the zone, move onto the next drum, working the same way.
  • Solo the effects buses if you find it useful, but I rarely bother, because I want to hear how it sounds with the specific part I'm working on.
  • Once you're happy with all the drums, switch any Solo buttons off to find out how the drums work against the other parts,
  • It's your mix, but I generally work next on the bass, followed by guitars, then keys, then vocals, switching Soloes in and out frequently so I can compare how each part sounds in isolation.
  • Think of the process as circular, in that once you've adjusted all the tracks, you'll probably want to go back and make tweaks to some of the parts you worked on earlier.
  • At the end of a long mix session, it's a good idea to give your tired ears a rest overnight, then play the mix another day when your ears are fresh.
It's very hard to make great mixes on bad monitors! As well as using very flat speakers and headphones to mix, I play my mixes on the little system in the kitchen, the home theater in the livingroom, and in the car. It's amazing how traffic noise changes your perception of vocal levels. (I once wrote a song for a girfriend, but when I played it in her car, the vocals were so quiet, she didn't even notice her name in the lyrics. Lesson learned…)
 
No more bussing for me, my project seems to go somewhere elese when i try it. Like disappears & re creates itself ..:hmmm: Think it made me focus on less is more. There is not much of anything on the songs these days except what i am trying to capture in the room.
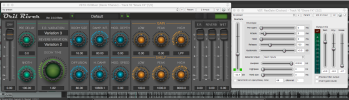
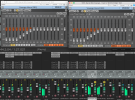
Recently have been really mapping things out, literally carry a piece of paper in my pocket as my song comes together in my head & then riffing in the band room. I start to write the object of the song down & what goals & directions i hear it going.

Like today. Finished up drums & Recording all the clean parts to next song, going to sing over it & focus on this. Then tomorrow or first burst of anger caused by work to fuel the aggression. will mic up the 5150 & let it rip
 
This is the video I promised about the two snare mics being out-of-phase. If the embedded version won't play for you, please use the YouTube button to play it directly from there.

 
  • Like
Reactions: PLX
Going back to the video I posted on Monday, you'll find that the Snare FX contains a reverd, followed by a gate. Why? Well, if you listen to it, the gate is making the reverb time a lot shorter and more percussive, which retaining the lush, dense sound of the original reverb setting.

Snare Reverb Gate.png
 
Let's talk about the drum overhead mics (OH) for short. They're always potentially problematic in a live setting, because they tend to pick up absolutely everything, along with the cymbals, which is what I was really after. To make things worse, you can usually only apply light gain reduction to the gates if you're going to stop the cymbals cutting out early and generally everything comeing through mics sounding bad. In order to help the situation I out EQ's ahead of the gates, and filtered out a whole section of the low end. This not only healps to clean up the mix, it gives the gates a simplified task, because they are dealing with a reduced audio spectrum. In the recording below, you hear the OHs with the EQ in place, then without (which makes the kick a lot louder, among other things) them I put the EQs back, to give you a second chance to compare.


EQ before gates.png
 
Those of you with really sharp eyes might notice I've applied 'Reverb tight' via the aux mix to the Left OH but not the right. Strangely, I've applied the same amount of that reverb to the HiHat. This is a mistake, and I didn't even hear it in the overall mix. Ooops! :rolleyes:
 
Those of you with really sharp eyes might notice I've applied 'Reverb tight' via the aux mix to the Left OH but not the right. Strangely, I've applied the same amount of that reverb to the HiHat. This is a mistake, and I didn't even hear it in the overall mix. Ooops! :rolleyes:
Simon, what software or hardware do you use for "ducking" a background instrument out of the way of a lead instrument in a mix ?

Compressor ?

Dynamic EQ ?

:unsure:
 
Simon, what software or hardware do you use for "ducking" a background instrument out of the way of a lead instrument in a mix ?

Compressor ?

Dynamic EQ ?

:unsure:
Noise gate, or eq and noise gate, look to be his mainstays on the above tracks. Eq, pre gate, can help the gate, focus, and do its job more efficiently in some cases.
 
Simon, what software or hardware do you use for "ducking" a background instrument out of the way of a lead instrument in a mix ?

Compressor ?

Dynamic EQ ?

:unsure:
Everything I do now – apart from the musical instruments – is done 'in the box' these days, meaning that it's all software. Hardware processors take up a lot of space, cost way more than I could justify spending, require physical patching into the signal path, and need servicing now and then. By contrast, software is cheap, especially when you consider that you can buy one compressor, for example, then use as many 'instances' as your mix requires. If you look at the examples I've posted in this thread, you'll see I use the same compressor and gate plug-ins across many tracks.

Line ducking is not a technique I'd normally use on a musical mix, and if I felt I needed it to get the vocal or lead instrument to sit right in the mix, I'd ask myself what's really going wrong. The first place to look is the arrangement itself. If that's right to start with, we should need to do too much heavy lifting at the mix stage. You might think I'm crazy, but I invite you to listen to this Frank Sinatra recierding of Fly Me to The Moon:

 
So, what's going on when Ol' Blue Eyes is singing? Remarkably little. Remember, this is a big band, but the fancy bits come between the vocal phrases, not over the top of them. And when one instrument plays a little motif, the other players stay right out of the way by sticking to comping the chords, or playing little or nothing. Bear in mind that this arrangement had to work on radio, record players with lift-up lids, TVs with 7" eliptical speakers… whatever the playout medium, Frank had to be right up front and centre.

But mix engineers don't notmally have the luxury of being involved in the arrangement, in terms of what's been recorded on each track. I had the very good fortune to watch and learn from Pete Hammond, who mixed many hits in the 1980s for acts produced by Stock Aitkin Waterman, including Kylie Monogue. At one time, the team was so busy that Pete used to mix through the night, so that the studio was available to record more hits during the day!

Pete told me that the 24 track he was fresented with was usually jam-packed with far more material than could be used simultaneously in the final mix. For instance, I seem to remember the dancefloor hit Roadblock had three bass lines in places, meaning it would be possible several alternate mixes. I'll explain the process by which we can work with this apparent madness to end up with a hit in the next post.
 
Back
Top