Eric'45
Well-Known Member

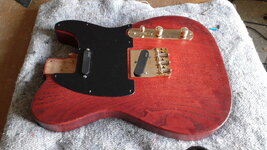
There is some story behind it. Some years ago, I wanted to build a partscaster with the maple neck of my Mexican Tele. I bought an assortment of parts, from Rockinger and started messing around. I have to admit I didn't really know what I was doing, and something was not right about the guitar. To make a long story short, I ended up bolting the maple Neck back to the mexican body where it came from, and all was well. Some time later I moved and so I kinda forgot I had a spare Telecaster Body somewhere. I had dyed it a dark Red and finished it in Satin Nitro.
Yesterday I stumbled upon an ad for a set of active Telecaster PUs.
What I have now is a dark Red Swamp Ash Body from Rockinger and a set of Active Tele PUs from EMG. I have ordered a Blck single- ply Pickguard and a complete set of gold Hardware from Thomann which is due sometime this week.
And now comes the fun part: I also have a slab of Wenge wood and I will try to build a Neck for this Body from scratch. I have tried this before, but i messed up the fretboard radius and I had ordered the wrong fretwire .
.
Now I have cut two Wenge Fingerboard blanks and a third from Palisander. Let's see how that will turn out this time.
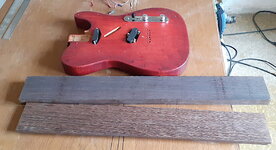
Yesterday I stumbled upon an ad for a set of active Telecaster PUs.
What I have now is a dark Red Swamp Ash Body from Rockinger and a set of Active Tele PUs from EMG. I have ordered a Blck single- ply Pickguard and a complete set of gold Hardware from Thomann which is due sometime this week.
And now comes the fun part: I also have a slab of Wenge wood and I will try to build a Neck for this Body from scratch. I have tried this before, but i messed up the fretboard radius and I had ordered the wrong fretwire
.Now I have cut two Wenge Fingerboard blanks and a third from Palisander. Let's see how that will turn out this time.


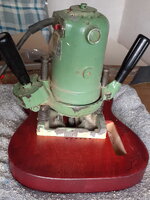

 It is a german "Scheer", from the 60s, probably. It has outlived it's previous owner, the man I bought my house and workshop from. It's got plenty of power and takes all modern tools (which is a necessity).