Odd Intonation Issue on 24.75" Tele-Style Build:

Robert, are you more concerned with what you calculated the placement of the bridge mounting and are now not happy with the apparent difference in saddle measurements when you measure them once to the desired intonation? Or are you saying on the D and high E strings, your screw is maxed out and thus you are unable to attain the range needed to get fully intonated properly?
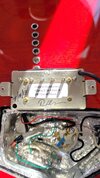
 
Robert, are you more concerned with what you calculated the placement of the bridge mounting and are now not happy with the apparent difference in saddle measurements when you measure them once to the desired intonation? Or are you saying on the D and high E strings, your screw is maxed out and thus you are unable to attain the range needed to get fully intonated properly?

I built this one in 2017 and I've come light years on my skills since then.

20211124_143755.jpg
 
Last edited:
Ok,

The 12th fret is not the only place intonation should be checked. I check every note - from the first to the 12th fret - and average them as needed.

Better to have all the notes in a given chord read true and have a slight deviation in pitch at the12th.


I kind of approach things like OK, Set intonation at 12th, then of course can use tuner to test all the notes. Of course, my fingertips can mash notes out of wack if I am not perfect.
 
I kind of approach things like OK, Set intonation at 12th, then of course can use tuner to test all the notes. Of course, my fingertips can mash notes out of wack if I am not perfect.

When I set up a guitar for a player, I watch them play with a tuner. I will intonate differently based on playing style. When I play a guitar that I have intonated, I will play chords with the tuner and watch to se that no individual notes of a chord are going sharp when fretted. At this point in the process, I may move the adjustment slightly to ensure that the chords are playing in absolute perfect pitch. Sometimes, this will equate to intonation being off slightly at the 12th, but this is acceptable, because by the time you get to the 12th fret, its highly likely that you are playing leads and perfect pitch is not required.
 
That is why I asked the questions I was asking too. I suspected longer screws might do it.

My first scratch build was a black 24.75" scale Stratocaster with a Floyd Rose. I mis-located the bridge on it enough that it cannot be intonated. It's basically a display item in my Mom's studio. Each one of these guitars was a little different. On some, I did a better job on the finish than others, even though they all looked nice. On some, I got the bridge placement better than others, but in all candor, I was learning as I went along and my work - and my skill set - evolved during the journey too.
 
My first scratch build was a black 24.75" scale Stratocaster with a Floyd Rose. I mis-located the bridge on it enough that it cannot be intonated. It's basically a display item in my Mom's studio. Each one of these guitars was a little different. On some, I did a better job on the finish than others, even though they all looked nice. On some, I got the bridge placement better than others, but in all candor, I was learning as I went along and my work - and my skill set - evolved during the journey too.

Totally understood.

 
Totally understood.

So, in this case, the holes in the center of the bridge plate (where the strings pass though the body) are exactly 25.0" from the bridge face of the nut. The 12th fret centerline is exactly 12.250" from the bridge face of the nut, which makes this a 24.50" scale guitar according the formula from Stewie-Mac's website. Additionally, the Stewie-Mac calculator calls for bridge centerline to be 24.260" from the bridge face of the nut on a 24.50" scale guitar, and 24.507" on a 24.75" scale guitar.

When I was locating these bridges, I would assemble the bridge and place the intonation screws in roughly the center of their travel, then measure from the bridge face of the nut to the saddle radius and that's how I located the bridge. Now, when reading the 'fine print' on the Stewie-Mac website, their fret and bridge position calculator states, "Distance indicated is from the fretboard edge of the nut to center of forward-most mounting screw or pivot post.."

1638111040688.png


Ok, so measuring from the bridge edge of the nut to the centerline of the forwardmost bridge plate mounting screw (as the Stewie-Mac calculator recommends) I get 24-5/176" or 24.312" The Stewie-Mac desired specification is 24.260" respectively, so my error is around .052" too far rearward, which means my saddles have to move farther forward.

The cool thing is, even with a longer screw and even when intonated to pitch, the high '3' string saddles height adjustment screws are still located within the recesses on the bridge plate that provide for lateral stability of the saddles.

Also, I have an almost perfect lightning bolt arrangement to the saddles, and it plays well and in tune at all points across the neck.

Let's just say that I have learned a little more than I knew at the time.
 
Last edited:
I am following you, Robert. Here is a conundrum I would have locating bridges, Post holes etc.
HOW does one get proper center lines, mounting stuff straight etc with an already contoured body?

If I were building a guitar, I would likely feel most comfortable locating and drilling, routing, assembling things if I used a rectangular blank of wood. Unless somehow I used a laser to run the line down the body dead center in neck pocket and even with a neck installed to make sure all lines up.

How do you guys do it?
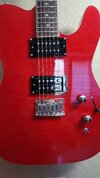
 
I am following you, Robert. Here is a conundrum I would have locating bridges, Post holes etc.
HOW does one get proper center lines, mounting stuff straight etc with an already contoured body?

If I were building a guitar, I would likely feel most comfortable locating and drilling, routing, assembling things if I used a rectangular blank of wood. Unless somehow I used a laser to run the line down the body dead center in neck pocket and even with a neck installed to make sure all lines up.

How do you guys do it?

I think manufacturers locate and drill all the holes and cavity routes while the body is still a flat slab, then the body is contoured.
 
I am following you, Robert. Here is a conundrum I would have locating bridges, Post holes etc.
HOW does one get proper center lines, mounting stuff straight etc with an already contoured body?

If I were building a guitar, I would likely feel most comfortable locating and drilling, routing, assembling things if I used a rectangular blank of wood. Unless somehow I used a laser to run the line down the body dead center in neck pocket and even with a neck installed to make sure all lines up.

How do you guys do it?

You need to ask a smarter fellow.
 
You need to ask a smarter fellow.
You are pretty smart, Robert.

I ran into this scenario when I was drilling my glued in dowel plugs ( by hand) for my Epiphone LP's Tailpiece inserts.

The LP has quite a contour AND as we all know the LP body is nothing but curves. Locating the center to center of the holes was one thing to allow for, and the other was at what angle do I hold the drill in order to get the inserts seated into the body right, and have the Tail piece studs at the right spread and proper angle for the tailpiece.

The reason I had to make this repair was due to sloppy holes drilled at the factory that permitted the inserts to "lift" upward and with a lean toward the head stock, under string tension. Drilled tighter holes, and put the drill kind of on an angle following the body contour.
This seems counter intuitive to how one might think could occur if one were to drill into an unshaped blank. I essentially took how the factory might have " pre- drilled" the holes then contoured the body. To me, if the factory went in this order, it opens things up to leading to an oval hole instead of a round one. I actually saw this condition on numerous EPI LP's while looking to see what was normal or an oddity at my mom and pop shop and GC. This is why I chose to drill in a contrary fashion to follow the contour to yield straight and round holes.
 
You are pretty smart, Robert.

I ran into this scenario when I was drilling my glued in dowel plugs ( by hand) for my Epiphone LP's Tailpiece inserts.

The LP has quite a contour AND as we all know the LP body is nothing but curves. Locating the center to center of the holes was one thing to allow for, and the other was at what angle do I hold the drill in order to get the inserts seated into the body right, and have the Tail piece studs at the right spread and proper angle for the tailpiece.

The reason I had to make this repair was due to sloppy holes drilled at the factory that permitted the inserts to "lift" upward and with a lean toward the head stock, under string tension. Drilled tighter holes, and put the drill kind of on an angle following the body contour.
This seems counter intuitive to how one might think could occur if one were to drill into an unshaped blank. I essentially took how the factory might have " pre- drilled" the holes then contoured the body. To me, if the factory went in this order, it opens things up to leading to an oval hole instead of a round one. I actually saw this condition on numerous EPI LP's while looking to see what was normal or an oddity at my mom and pop shop and GC. This is why I chose to drill in a contrary fashion to follow the contour to yield straight and round holes.

Sounds like you did it right!!!!
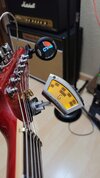
 
Sounds like you did it right!!!!

Robert, I know it is hard to visualize when trying to read the words and not actually doing the job yourself or seeing the thing in person.

I am operating on a new laptop that I have not loaded pics on yet, so I can't post the pics and doctor them up with arrows and stuff. I did that kind of stuff on amps a little of on my old laptops. Maybe @SG John can help me scratch my head and answer how he addresses the tail piece inserts into the bodies scenario.
 
Back
Top