Well brother's,
After chewing everyone's ear and derailing another bro's thread I decided to shield my L.P.
If this goes well, my Johnson is next. (never get tired of that joke).
Received my copper foil from Antique Electronics, and I'm off to the workshop this weekend.
Oh paging
@Robert Herndon and company, hope y'all don't mind my questions over the next couple of days, because I have questions lol.
Please be patient, and remember "There are no stupid questions- just stupid people. I'm raising my hand now!
Thanks in advance everyone.
Here's the method I use. perhaps it will help you...
When finished, you should have a nice, 'patchwork quilt' look to the cavity.
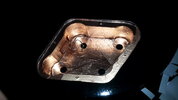
On a Les Paul, I start by taking a section of paper and covering each cavity. I then press down to impart a ridge in the paper that matches the outline of the cavity. I will then cut along the indentation and set it aside. In your case with 2" wide tape, I will lay the paper across the face of the tape and trace the outline. Two pieces can be overlapped to cover the bottom of the control cavity. Once these are cut, I apply them to the bottom of the cavity and press them down with a wooden dowel, or a wooden spoon.
Next, I will cut strips of tape - rough;t 1/4" wide - and apply them into the radius between the floor and wall of the cavity. A dowel or wooden spoon works great here as you can roll it along the transition and press the tape into place. Don't sweat a tear in the tape. Just patch the tear and move forward.
For the walls of the cavity, I again make a paper template and transfer that to my tape. I cover the walls in 4 long sections, but the longer the tape, the harder it is to handle when the backing is removed, so shorter sections are fine.
For the top, again a paper template is useful and eliminates waste. I sometimes shield 4-5 guitars a week, so I try to avoid waste at every turn and get the guitars done as quickly as possible.
Now, when I first started doing this, I used a different approach that made the tape easier to handle. Long sections of tape are tough to handle as they want to roll up on you. I will describe this method. It's the method I recommend for beginners.
With 2" tape (any width can be used but 2" is used here because that's the width you are using) cut a section 2" long. Apply that to the middle of the cavity. Cut another. Apply it with about a 25% overlap. Then another and another, working your way across the cavity and up the walls of the cavity. It doesn't matter how many little sections you use. As long as they overlap, the Faraday effect will be complete.


